
Why Make This Pumpkin Patch Dirt Cups
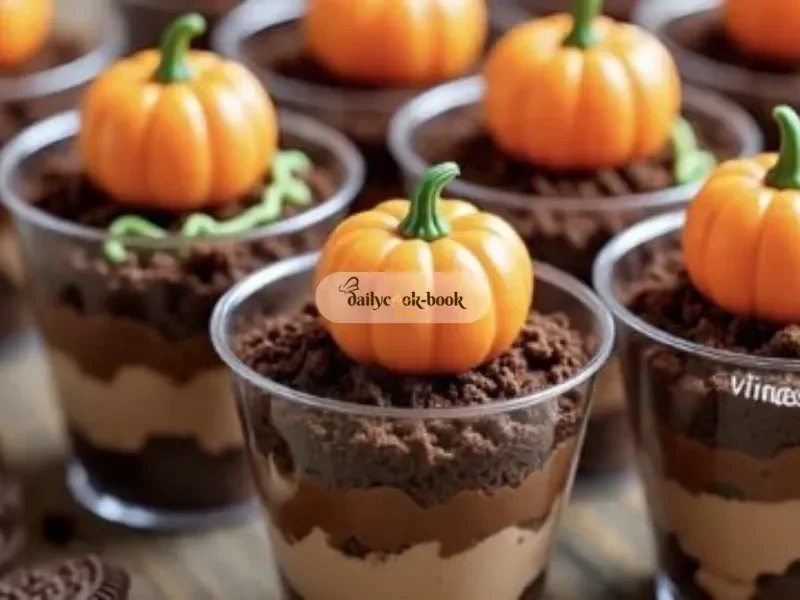
Pumpkin Patch Dirt Cups are the perfect treat for any fall gathering or Halloween celebration! They bring a fun and playful twist to dessert, making them a hit with both kids and adults alike. The rich chocolate flavor combined with the playful candy pumpkins creates a delightful contrast that looks adorable and tastes even better. These sweet cups not only satisfy your chocolate cravings but also engage your creative side, allowing you to build your own mini pumpkin patch right on your kitchen counter. It’s an easy, no-bake dessert that requires minimal time and just a few ingredients, making it a must-try!
How to Make Pumpkin Patch Dirt Cups
Making Pumpkin Patch Dirt Cups is a simple and enjoyable process. Following a few straightforward steps, you’ll create a delicious treat that’s as much fun to make as it is to eat. In about 30 minutes, you’ll have a dessert that will wow your guests and bring out the kid in everyone. Let’s dive right into the steps!
Ingredients:
- 2 cups cold milk
- 1 (3.9 oz) package instant chocolate pudding mix
- 1 (8 oz) container whipped topping (like Cool Whip), thawed
- 1 (14 oz) package chocolate sandwich cookies (like Oreos), crushed
- 12–16 candy pumpkins (candy corn brand or similar)
- Green frosting or green sprinkles (optional, for “vines” or grass)
- 6–8 clear plastic cups (8 oz size works well)
Directions:
Step 1: Prepare the pudding (5 minutes)
In a large bowl, whisk together the cold milk and the instant chocolate pudding mix for about 2 minutes. The mixture should thicken nicely.
Step 2: Fold in the whipped topping (2–3 minutes)
Gently fold the thawed whipped topping into the pudding mixture until fully combined. This gives the cups a light, fluffy texture. Be careful not to overmix!
Step 3: Crush the cookies (5 minutes)
Place the chocolate sandwich cookies in a plastic bag and crush them with a rolling pin or your hands. You want fine crumbs to emulate the “dirt” effect in your cups.
Step 4: Layer the cups (5–7 minutes)
In each clear plastic cup, layer some of the pudding mixture, followed by a generous layer of crushed cookies, and then repeat until you fill the cups. The layers should mimic the look of dirt and soil.
Step 5: Add the pumpkins and vines (5 minutes)
Top each cup with candy pumpkins. If you’d like, you can add green frosting or green sprinkles around the edges to represent vines or grass.
Step 6: Chill before serving (15–20 minutes, optional)
For the best taste and texture, chill the cups in the refrigerator for about 15 to 20 minutes before serving. This step is optional but makes the cups extra refreshing!
Nutritional Information
Per serving (1 cup):
- Calories: 250
- Total Fat: 12g
- Saturated Fat: 7g
- Cholesterol: 15mg
- Sodium: 100mg
- Total Carbohydrates: 33g
- Dietary Fiber: 1g
- Sugars: 19g
- Protein: 3g
Note: Nutritional information may vary based on specific brands and ingredient choices.
How to Serve Pumpkin Patch Dirt Cups
Serve these delightful dirt cups as a fun dessert at birthday parties, Halloween gatherings, or family get-togethers. They’re excellent for kids’ parties, where each child can enjoy their own personalized pumpkin patch! Consider pairing them with apple cider or a warm cup of cocoa for that extra cozy fall vibe.
How to Store Pumpkin Patch Dirt Cups
If you have leftovers, cover the cups with plastic wrap or place them in an airtight container. They will stay fresh in the refrigerator for up to 3 days. Be mindful that the cookie crumbs may soften a little over time, so it’s best to enjoy them fresh!
Expert Tips for Perfect Pumpkin Patch Dirt Cups
- Crunchy Layers: If you want a more textured “dirt,” use bigger cookie pieces instead of fine crumbs to add some variety.
- Sweet Tooth Alert: Swap the chocolate cookies for vanilla cookies if you prefer a lighter flavor. The contrast with the pudding will still be delightful!
- Decor: Let the kids help! Allow them to help decorate the cups with the candy pumpkins and frosting to make it a fun activity.
Delicious Variations
- Pudding Flavor Switch: Try different pudding flavors, like vanilla or butterscotch, for a unique twist.
- Add Fruit: Mix in some crushed fruits like raspberries or strawberries for a tart contrast to the sweet chocolate.
- Choose Alternative Toppings: Instead of candy pumpkins, use gummy spiders or worms for a spooky surprise!
Frequently Asked Questions
1. Can I make these cups a day in advance?
Yes! You can prepare the pudding and layer the cups a day ahead. Just keep them covered in the refrigerator. They’ll be ready to serve the next day!
2. Can I use homemade whipped cream instead of Cool Whip?
Absolutely! Homemade whipped cream adds a delightful freshness. Just be sure to stabilize it to maintain its fluffiness.
3. What can I substitute for chocolate sandwich cookies?
If you’re looking for a less sweet option, consider using crushed graham crackers or even vanilla wafers.
Conclusion
Pumpkin Patch Dirt Cups are a fun, easy, and delicious dessert that will impress everyone around your table. With rich chocolate layers and adorable candy pumpkins, they are sure to become a seasonal favorite. I encourage you to give this recipe a try—simple enough for kids to help make and delicious enough to satisfy everyone’s sweet tooth. Happy baking, and don’t forget to share your delicious results!